Vuoi sapere come installare le luci da parete? Puoi scegliere luci cablate per un look permanente o optare per opzioni non cablate, come luci a spina o a batteria. La sicurezza viene prima di tutto, sempre. spegnere l'alimentazione Prima di iniziare, prenditi il tempo necessario e usa gli strumenti giusti. Saltare i passaggi o procedere in fretta può causare problemi come luci tremolanti, scosse elettriche o persino incendi. Se segui ogni passaggio, puoi gestire questo progetto con sicurezza!
Punti chiave
- Scegli la lampada da parete che si adatta alle tue esigenze. Le luci cablate rimangono in posizione. Le luci a batteria e a spina sono facili da spostare.
- La sicurezza viene prima di tutto. Spegnere l'alimentazione prima di iniziare. Utilizzare gli strumenti giusti per il lavoro. Controllare il lavoro per evitare problemi elettrici.
- Prepara tutti gli strumenti e i materiali prima di iniziare. Essere preparati fa risparmiare tempo. E ti aiuta anche a non agitarti durante il lavoro.
- Leggere e seguire le istruzioni del produttore per l'installazione. Montare e cablare le luci nel modo corretto. In questo modo le luci saranno sicure e funzionanti correttamente.
- In caso di problemi o incertezze, contattare un elettricista qualificato. La tua sicurezza è ciò che conta di più.
Strumenti e materiali
Prima di iniziare a montare le applique, è necessario procurarsi gli strumenti e i materiali giusti. Avere tutto pronto renderà il progetto più agevole e sicuro. Non vorrai certo fermarti a metà lavoro perché hai dimenticato qualcosa di importante!
Strumenti essenziali
Per questo lavoro avrai bisogno di alcuni attrezzi di base. La maggior parte di questi probabilmente è già nella tua cassetta degli attrezzi. Ecco cosa dovresti avere a portata di mano:
- Le tronchesi aiutano a tagliare i fili alla lunghezza giusta.
- Gli spelafili consentono di rimuovere l'isolamento dalle estremità dei fili.
- Le pinze garantiscono una buona presa quando si attorcigliano i fili.
- Per allentare e stringere le viti sono necessari cacciaviti (sia a testa piatta che a croce).
- Gli occhiali di sicurezza proteggono gli occhi da polvere e detriti.
- I guanti proteggono le mani dai bordi taglienti.
- Un rilevatore di tensione è facoltativo, ma aiuta a verificare se l'alimentazione è effettivamente interrotta prima di toccare qualsiasi filo.
Mancia: Prima di iniziare a lavorare con i cavi, controlla sempre che l'alimentazione sia interrotta con il tuo rilevatore di tensione. La sicurezza viene prima di tutto!
Lista di controllo dei materiali
Ora parliamo dei materiali di cui avrai bisogno. L'elenco cambia leggermente a seconda che tu stia installando una luce cablata o una non cablata. Ecco i materiali di base:
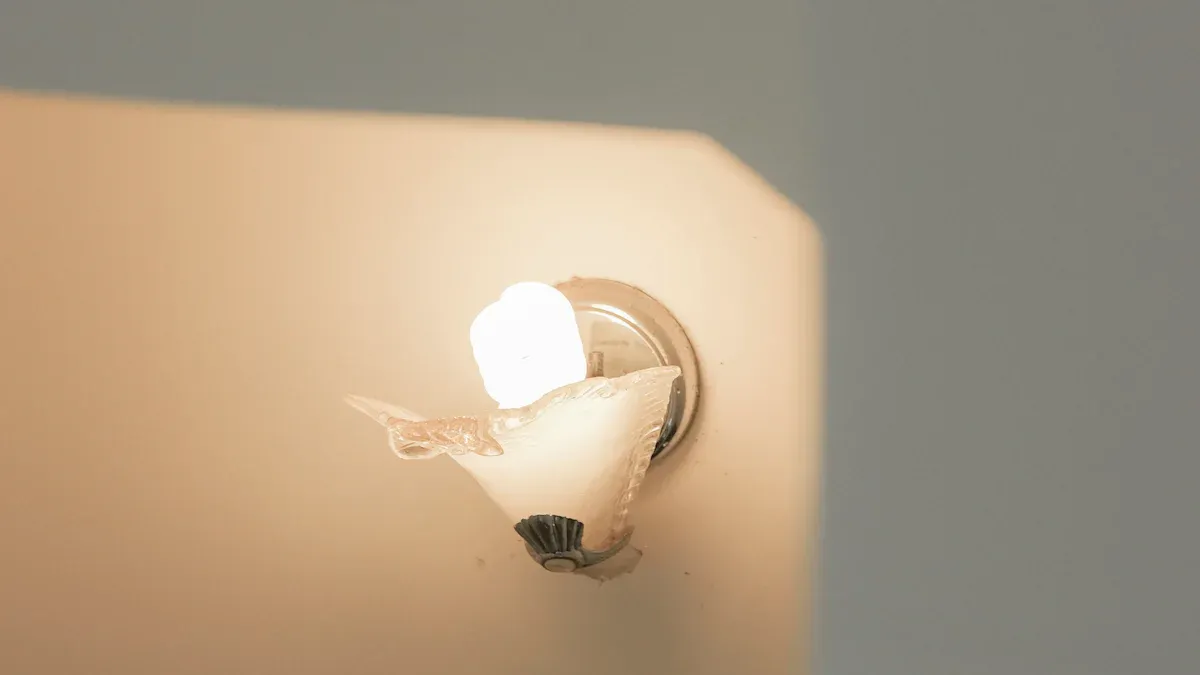
- Scegli un applique o lampada da parete che si adatta al tuo stile. Le luci opache sono perfette se desideri un'illuminazione più soffusa.
- Per montarla in modo sicuro, utilizzare l'hardware fornito con la luce, come tasselli e viti.
- Potrebbero essere necessari dei capicorda aggiuntivi per collegare i fili in modo sicuro.
- Se preferisci un'opzione non cablata, procurati 4-6 luci a disco a batteria. Molte sono dotate di telecomando per un facile utilizzo.
- Per montare alcune luci è necessario un cacciavite, quindi tenetene uno a portata di mano.
Avere a portata di mano questi strumenti e materiali ti aiuterà a installare le tue applique con sicurezza. Risparmierai tempo ed eviterai frustrazioni preparandoti prima di iniziare.
come installare le luci da parete: installazione cablata
Posizione di marcatura
Trovare la posizione giusta per la tua applique fa una grande differenza. Inizia appoggiando la piastra di montaggio o la staffa dell'apparecchio alla parete. Usa una matita per segnare il punto in cui vuoi posizionare la luce. Assicurati di allinearla con le linee di design o con i mobili della stanza.Prendi una livella e controlla che i segni siano dritti. Se prevedi di installare più di un'applique, lasciare circa 8-10 piedi tra ciascuno Per un'illuminazione uniforme. Ricontrolla le misure in modo che le luci siano equilibrate e ordinate. Considera anche il materiale delle pareti. Cartongesso, mattoni e piastrelle potrebbero richiedere tasselli o viti diversi. Prendersi il tempo necessario ti aiuterà a evitare errori in seguito.
Mancia: Consultare sempre le istruzioni del produttore per conoscere l'altezza e la distanza di montaggio ottimali. Questo aiuta a evitare problemi di peso o di posizionamento non uniforme.
Taglio e foratura
Ora devi fare spazio per i cavi e la staffa di montaggio. Usa un metro a nastro per riportare i segni fatti nel passaggio precedente. Disegna un riquadro o un cerchio sulla parete nel punto in cui andrà posizionato il dispositivo. Per il cartongesso, usa una taglierina per cartongesso per tagliare il contorno. Fora lentamente e con attenzione. Questo ti aiuterà a evitare di urtare cavi o tubi all'interno del muro. Non forare mai direttamente sopra, sotto o accanto a prese o interruttoriLimita la profondità di foratura a meno di 3,8 cm. Puoi usare del nastro adesivo di carta sulla punta del trapano per segnare la profondità di sicurezza. Se hai bisogno di un foro più grande, infila prima un chiodo al centro, poi usa un taglierino circolare per incidere il cartongesso. Estrai delicatamente il tassello.
Nota: Forare lentamente impedisce la formazione di crepe nel muro e contribuisce alla tua sicurezza. Se non ti senti sicuro, fermati e chiedi aiuto a un elettricista qualificato.
Cablaggio e montaggio
Ora sei pronto per collegare i fili. Per prima cosa, fai passare i fili attraverso il foro e nella scatola di derivazione. Piega i fili ordinatamente in modo che entrino nella scatola senza pizzicarli. Usa una pinza spelafili per rimuovere un piccolo pezzo di isolamento da ciascuna estremità. Abbina i fili dalla parete ai fili della lampada: di solito nero con nero, bianco con bianco e verde o rame nudo con terra. Intreccia i fili insieme e coprili con i capicorda. Avvolgi ogni collegamento con nastro isolante per maggiore sicurezza. Fissa la staffa di montaggio alla parete utilizzando viti e tasselli. Se la parete sembra fragile, usa bulloni a espansione per una tenuta più forte. Segui le istruzioni del produttore per il tuo apparecchio specifico. Il mancato rispetto di questi passaggi può causare oscillazioni o addirittura cadute della lampada. Può anche causare problemi elettrici.
| Requisito | Descrizione |
|---|---|
| Stanze abitabili | Deve essere installata almeno una presa di corrente a parete controllata da un interruttore in ogni stanza abitabile, cucina e bagno. |
| Posizioni aggiuntive | Nei corridoi, nelle scale e nei garage dotati di alimentazione elettrica devono essere installate prese di corrente. |
| Ingressi esterni | Per gli ingressi o le uscite esterne con accesso a livello del suolo deve essere installata almeno una presa di corrente a parete controllata da un interruttore. |
| Scale | Nelle scale interne con sei o più alzate, a ogni piano deve essere installato un interruttore a parete per le prese di illuminazione. |
| Spazi di archiviazione | Nelle soffitte, negli spazi interrati, nei locali di servizio e nei seminterrati utilizzati per lo stoccaggio o la manutenzione delle attrezzature deve essere installata almeno una presa di corrente con interruttore. |
Attenzione: Se non si seguono le istruzioni del produttore, si rischia di danneggiare i componenti, causare scosse elettriche o persino incendi. Verificare sempre il limite di peso della scatola elettrica.
Controlli di sicurezza
Prima di riaccendere l'alimentazione, esegui alcuni controlli finali. Assicurati che tutti i collegamenti dei cavi siano ben saldi e sicuri. Utilizza dei capicorda e copri ogni filo esposto con del nastro isolante.Controlla che la lampada sia ben fissata e non oscilli. Prova la lampada riaccendendo l'interruttore. Se la lampada funziona e non senti nulla di allentato, hai fatto tutto correttamente! Se vedi scintille, odore di bruciato o la lampada tremola, stacca la corrente e chiama un professionista.
- Assicurarsi che tutti i collegamenti siano ben saldi e sicuri.
- Utilizzare cappucci per cavi e nastro isolante per coprire i fili scoperti.
- Verificare che il dispositivo sia montato saldamente.
- Prima di concludere, prova la luce.
Mancia: Se hai dubbi su come installare le luci da parete, è sempre consigliabile chiamare un elettricista qualificato. La tua sicurezza viene prima di tutto.
Opzioni non cablate
Non tutte le applique devono essere cablate. Esistono ottime opzioni non cablate che rendono l'illuminazione del tuo spazio semplice e flessibile. Queste soluzioni sono ideali se vivi in affitto, vuoi evitare lavori elettrici o semplicemente ti piace cambiare spesso le cose. Vediamo come puoi utilizzare applique con spina, luci a batteria e interruttori wireless per illuminare la tua casa.
Installazione plug-in
Le applique con spina sono le preferite da molti amanti del fai da te. Non c'è bisogno di armeggiare con i cavi all'interno del muro. Basta montare la lampada, collegarla a una presa e il gioco è fatto. Ecco come puoi farlo. installarne uno:
- Scegli il punto in cui installare l'applique. Assicurati che il cavo possa raggiungere la presa più vicina.
- Segnare dove andranno posizionate le viti.
- Praticare dei fori e inserire dei tasselli per fissare saldamente l'apparecchio.
- Fissare la piastra di montaggio con le viti.
- Fissare la lampada alla piastra.
- Aggiungere una lampadina e collegare il cavo alla presa.
Mancia: Seguire sempre le istruzioni del produttore. Molte luci plug-in sono dotate di caratteristiche di sicurezza come la protezione da sovratensioni e lo spegnimento automatico. Queste funzionalità contribuiscono a mantenere la tua casa al sicuro e a far funzionare le luci più a lungo.
Le lampade da parete con spina presentano alcuni chiari vantaggi:
- Puoi installarli facilmente.
- Se vuoi cambiare l'aspetto della tua stanza, puoi spostarli.
- Troverai tantissimi stili adatti ai tuoi gusti.
- La maggior parte funziona con lampadine a risparmio energetico.
Ma ci sono alcune cose a cui fare attenzione:
- Hai bisogno di una presa di corrente nelle vicinanze.
- Il cavo può dare un aspetto disordinato se non lo nascondi bene.
Se vuoi sapere come installare le luci da parete senza chiamare un elettricista, le opzioni plug-in sono una scelta intelligente.
Luci a batteria
Le applique a batteria offrono ancora più libertà. Non servono prese né cavi. Basta attaccarle o avvitarle alla parete e il gioco è fatto. Molte applique a batteria utilizzano un design a disco, piccolo e facile da posizionare ovunque. Alcuni marchi offrono persino un telecomando, così puoi accendere o spegnere le luci da qualsiasi punto della stanza.
- La maggior parte delle lampade da parete a batteria dura dalle 20 alle 100 ore con una singola carica. Il tempo esatto dipende dall'intensità luminosa impostata e dal tipo di batterie utilizzate.
- Le luci da parete cablate non si scaricano mai, ma quelle a batteria ti permettono di posizionare la luce esattamente dove vuoi, anche in luoghi senza prese di corrente.
Ecco una rapida occhiata ad alcuni marchi popolari e le loro caratteristiche:
| Caratteristica | Poplight | Redhoumy | Wayfair |
|---|---|---|---|
| Installazione | Buccia &e nastro adesivo 3M | Viti & Parentesi | Viti & Parentesi |
| Tipo di batteria | Ricaricabile | Applique con spina | Batterie AA |
| Opzioni di oscuramento | SÌ | SÌ | SÌ |
| Accorto | Sì, app gratuita | No, telecomando | No, telecomando |
| Opzioni di stile | 8 colori | Oro o Nero | Finitura in metallo |
| Prezzo | $$ | $$ | $$$ |
Nota: Se vuoi evitare di forare, cerca luci con retro adesivo. Sono perfette per chi è in affitto o per chi ama rinnovare spesso l'arredamento.
Interruttori wireless
Gli interruttori wireless consentono di controllare le luci da parete super facileNon è necessario far passare cavi attraverso le pareti. Puoi posizionare l'interruttore ovunque: su una parete, accanto al letto o persino sulla scrivania. Alcuni interruttori wireless funzionano con moduli plug-in, quindi puoi controllare le luci con un telecomando, il telefono o persino con la voce.
Ecco perché gli switch wireless rappresentano un'ottima scelta:
| Beneficio | Descrizione |
|---|---|
| Facilità di installazione | È possibile configurarli rapidamente e con poco sforzo. |
| Flessibilità | Posizionateli ovunque, anche in punti difficili o in stanze grandi. |
| Convenienza | Controlla le luci dal tuo telefono o tablet. Ideale per chi ha problemi di mobilità. |
| Controllo vocale | Molti funzionano con assistenti domestici intelligenti per un utilizzo a mani libere. |
| Sicurezza e protezione | Usa il telecomando e i timer per far sembrare che ci sia qualcuno a casa. |
| Efficienza energetica | Le funzioni intelligenti ti aiutano a risparmiare energia spegnendo le luci quando non servono. |
| Rapporto costo-efficacia | All'inizio potresti dover pagare di più, ma col tempo potrai risparmiare sull'installazione e sulle bollette energetiche. |
Mancia: Interruttori wireless e moduli plug-in ti permettono di controllare le luci senza alzarti. Sono perfetti per camere da letto, soggiorni o qualsiasi altro ambiente in cui desideri il massimo comfort.
Puoi combinare queste opzioni non cablate in base alle tue esigenze. Che tu voglia sapere come installare le luci da parete in un appartamento in affitto o semplicemente rinnovare rapidamente l'illuminazione, queste soluzioni ti semplificano la vita.
Risoluzione dei problemi e quando chiamare un professionista
Problemi comuni
A volte, anche seguendo ogni passaggio su come installare le luci da parete, qualcosa può andare storto. Potresti premere l'interruttore e non succede nulla. Non preoccuparti: la maggior parte dei problemi ha soluzioni semplici. Ecco alcuni problemi comuni e cosa puoi fare:
- Controllare che non vi siano crepe nell'apparecchio o fili sfilacciati. Le parti danneggiate possono impedire il funzionamento della luce.
- Controlla la lampadina. Se sembra bruciata o scolorita, provane una nuova.
- Assicurarsi che tutti i fili siano ben serrati nella presa e nei terminali.
- Utilizzare un multimetro per verificare se la corrente arriva all'apparecchio.
- Se la tua lampada utilizza un driver o un alimentatore, testalo. A volte questi componenti si guastano e devono essere sostituiti.
Potrebbero verificarsi anche problemi come sfarfallio o oscuramento. La tabella seguente mostra alcune delle cause più comuni e cosa significano:
| Causa | Spiegazione |
|---|---|
| Componenti di oscuramento dubbi | Alcuni dimmer non funzionano con tutte le luci. Questo può causare sfarfallio o ridurne la durata. |
| Pericoli dell'alta tensione | Una tensione eccessiva può surriscaldare e danneggiare la lampada. |
| Complicazioni di connessione | Collegamenti allentati o scadenti possono far sì che la luce funzioni solo a volte o non funzioni affatto. |
| Problemi di surriscaldamento | Se la luce diventa troppo calda, la lampadina o il LED potrebbero danneggiarsi. |
| Difetti di fabbricazione | A volte il problema è causato dalla fabbrica. I lotti difettosi possono causare guasti prematuri alle luci. |
Mancia: Controlla sempre le istruzioni del produttore. Spesso contengono istruzioni per la risoluzione dei problemi specifiche per la tua lampada.
Segnali per cercare aiuto
Molti piccoli problemi possono essere risolti da soli, ma alcune situazioni richiedono l'intervento di un professionista. La sicurezza elettrica è importante. Se non sei sicuro, è sempre meglio chiamare un esperto. Ecco alcuni segnali che indicano che dovresti chiedere aiuto:
- Si vedono scintille, fumo o odore di bruciato.
- L'interruttore scatta ogni volta che accendi la luce.
- I cavi sembrano danneggiati o l'isolamento è sfilacciato.
- Non ti senti sicuro di come installare le luci da parete in nessun passaggio.
- Trovi cavi elettrici complessi o vecchi impianti elettrici nella tua casa.
Gli elettricisti sanno come gestire questi problemi in modo sicuro. Rispettano gli standard di sicurezza e aiutano a prevenire scosse elettriche, incendi o altri incidenti. Se ti senti bloccato, non mettere a repentaglio la tua sicurezza. Chiama un elettricista qualificato e lascia che si occupi lui.
Attenzione: La tua sicurezza viene prima di tutto. In caso di dubbi, rivolgiti sempre a un professionista.
Installare le luci da parete è gratificante se si seguono i passaggi giusti. Inizia scegliendo un apparecchio che si adatti al tuo impianto elettrico, quindi posizionalo a un'altezza adeguata. Spegni sempre l'interruttore, indossa i guanti e utilizza strumenti come un tester di tensione e una pinza spelafili. Se non trovi alcun collegamento elettrico o non sei sicuro del tuo impianto elettrico, chiama un professionista. 🛠️ Mantieni pulite le tue luci e goditi il look fresco che doneranno al tuo spazio!
Domande frequenti
A quale altezza dovrei installare le luci da parete?
La maggior parte delle persone si blocca luci da parete Circa 152-170 cm dal pavimento. Questa altezza è adatta alla maggior parte delle stanze. Per risultati ottimali, consultare sempre le istruzioni del dispositivo.
Posso installare le luci da parete senza un elettricista?
Puoi installare tu stesso le luci da parete alimentate a batteria o con spina. Per le luci cablate, chiama un elettricista se hai dubbi o vedi vecchi cavi. La sicurezza viene prima di tutto!
Cosa succede se il mio muro è in mattoni o piastrelle?
Puoi comunque installare le applique su mattoni o piastrelle. Usa una punta da trapano per muratura e tasselli speciali. Procedi lentamente e con costanza per evitare crepe. Se ti senti nervoso, chiedi aiuto a un professionista.
Ho bisogno di lampadine speciali per le luci da parete?
La maggior parte delle lampade da parete utilizza lampadine standard.Alcuni richiedono lampadine a LED o intelligenti. Controlla sempre l'etichetta del tuo apparecchio. Usare la lampadina giusta mantiene la luce sicura e brillante.


